Features
- Sandboxed Rivet namespace: Create isolated environments for testing and deploying actors
- Deploy user or AI generated code: Deploy custom actor and frontend code directly to Freestyle
- Automatic configuration: Configure Rivet & Freestyle together automatically without manual setup
Implementation
The logic lives in src/backend/:
- Receives user or AI-generated code: The backend receives custom actor code (
registry.ts) and frontend code (App.tsx) - Creates a sandboxed Rivet namespace: Either using Rivet Cloud or Rivet self-hosted API (see
deploy-with-rivet-cloud.tsanddeploy-with-rivet-self-hosted.ts) - Deploys actor and frontend to Freestyle: Builds the project and deploys to Freestyle (see
utils.ts) - Configures Rivet to connect to Freestyle: Sets up the Rivet runner to point to the Rivet deployment for running the actors
Usage
Rivet Cloud
- Get Your Cloud API Token:
- Go to or create your project on Rivet Cloud
- Click on "Tokens" in the sidebar
- Under "Cloud API Tokens" click "Create Token" and copy the token
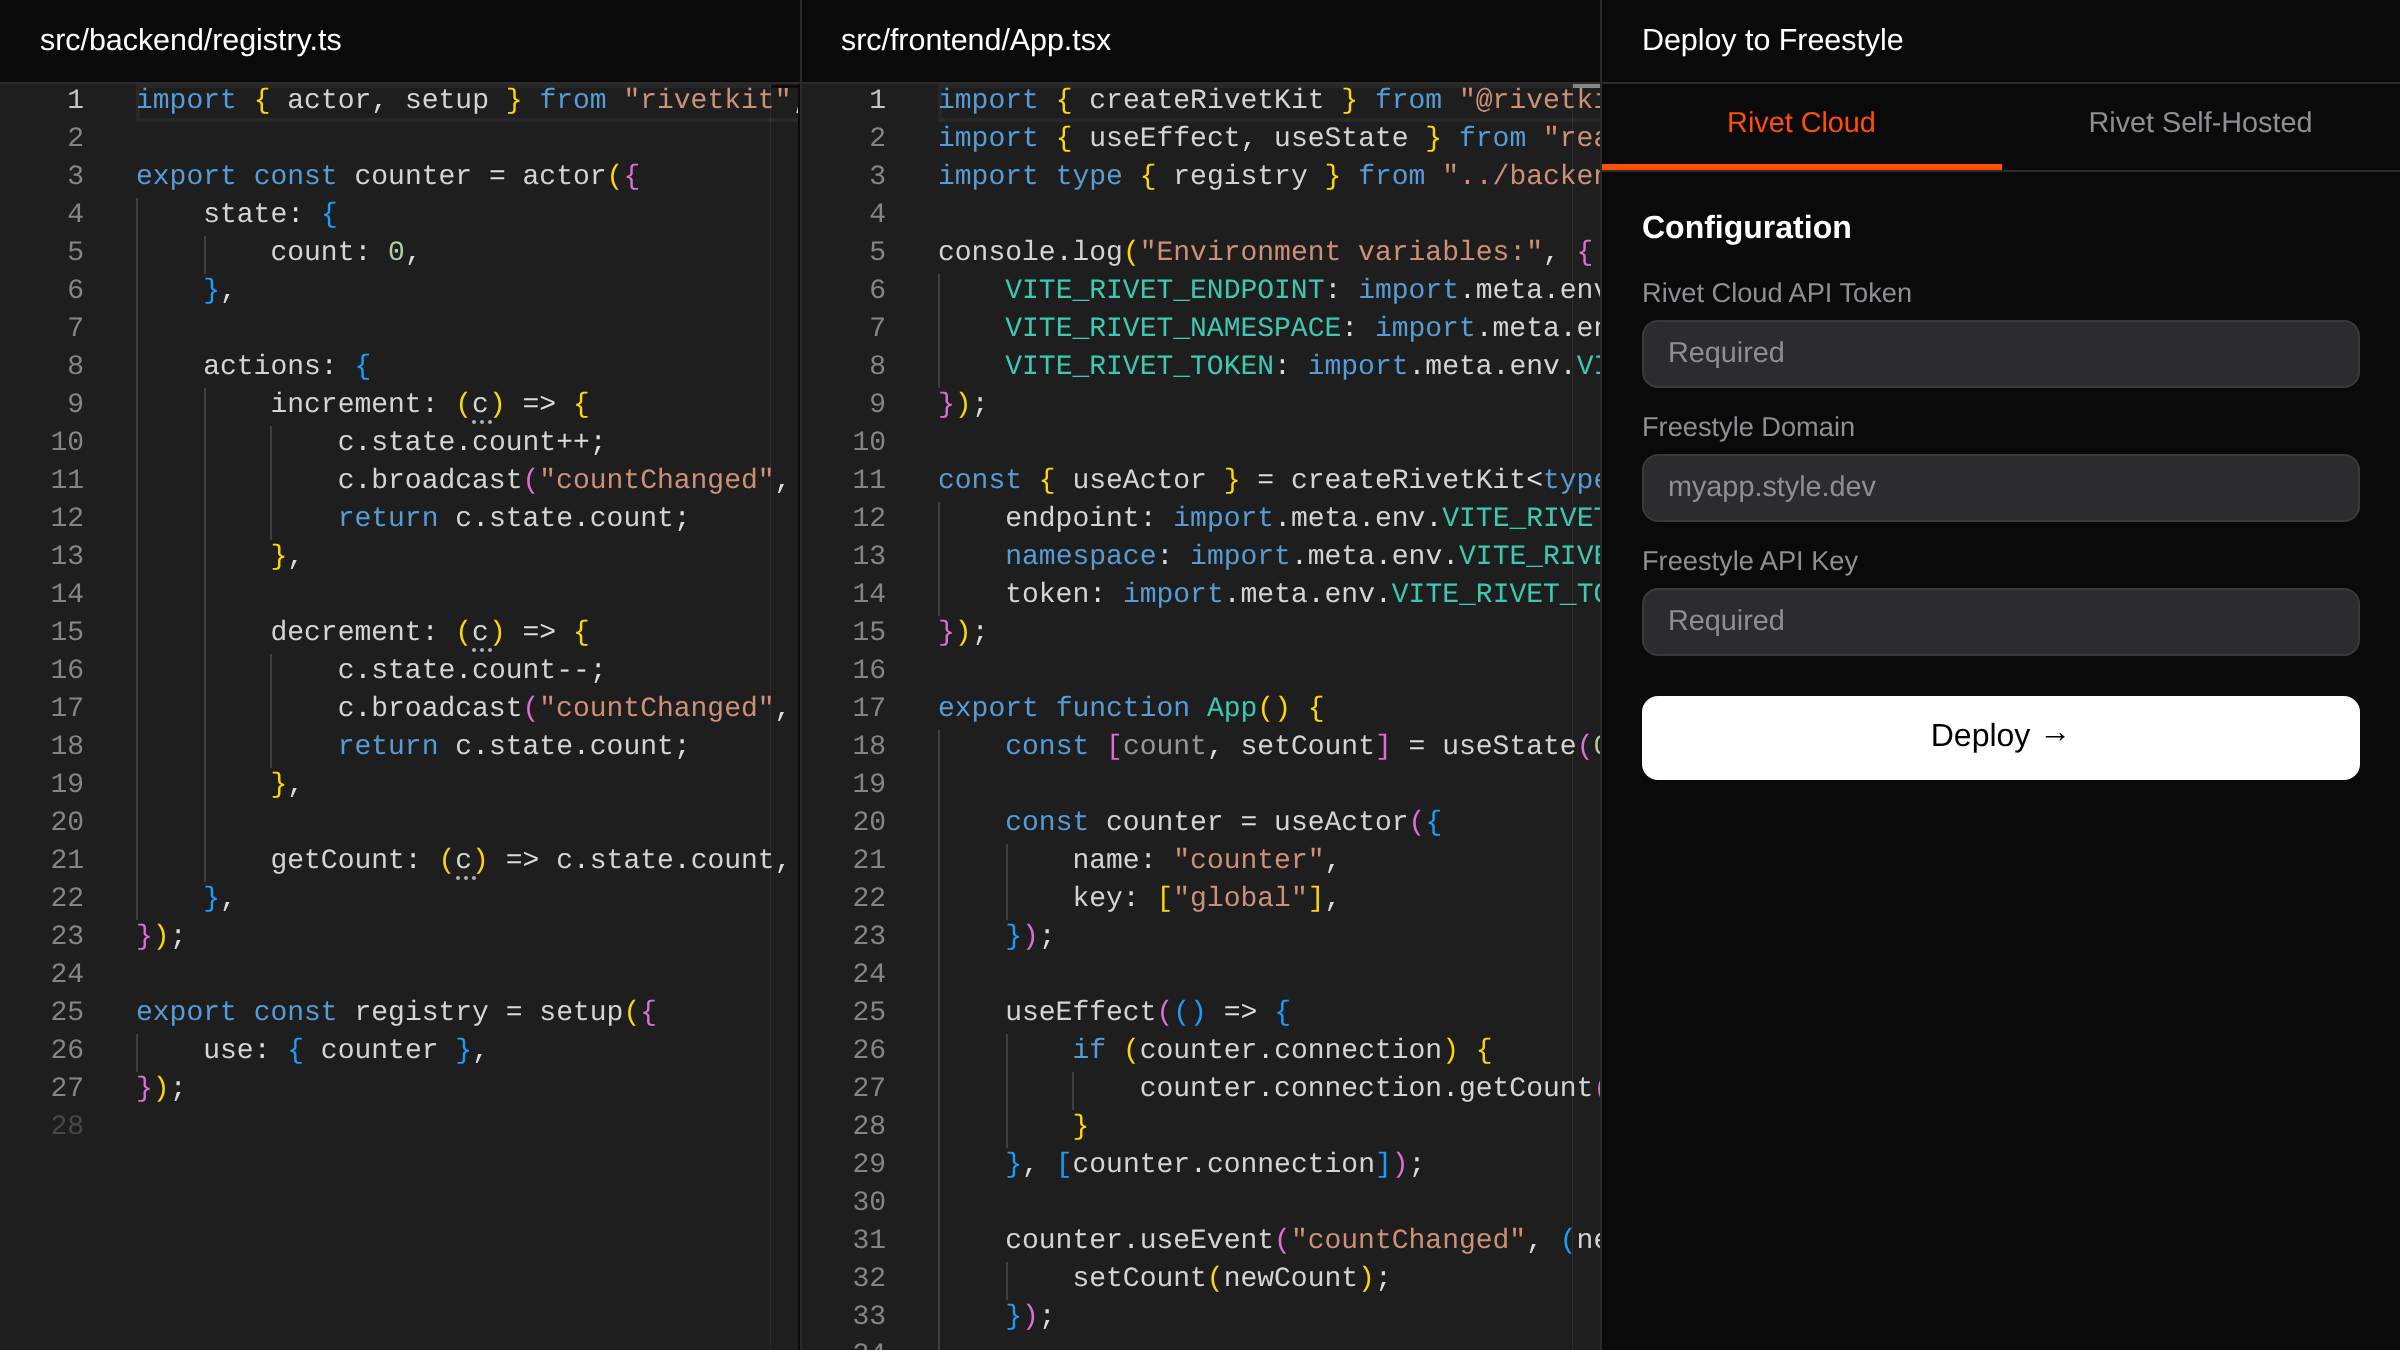
- Edit Code: Modify the
registry.tsandApp.tsxcode in the editors - Configure Deploy Config: Fill in all required fields:
- Rivet Cloud API token (from step 1)
- Freestyle domain (e.g., myapp.style.dev)
- Freestyle API key
- Deploy: Click "Deploy to Freestyle" and watch the deployment logs
Rivet Self-Hosted
- Edit Code: Modify the
registry.tsandApp.tsxcode in the editors - Configure Deploy Config: Fill in all required fields:
- Rivet endpoint (your self-hosted instance URL)
- Rivet API token
- Freestyle domain (e.g., myapp.style.dev)
- Freestyle API key
- Deploy: Click "Deploy to Freestyle" and watch the deployment logs
Project Structure
src/
	backend/  # Backend used to deploy your sandboxed Rivet backend code
	frontend/ # Frontend for the deploy UI you'll be using
template/  # The Rivet template code to deploy with Rivet
	src/
		backend/ # Actor code to be deployed
		frontend/ # Frontend to be deployed
tests/ # Vitest tests
Resources
Read more about AI and user generated actors.